
Import Data
When a file is uploaded into Tech Admin a data check takes place, analyzing the imported data line by line to determine if a new record is created, an existing record is updated, or if there is a data error.
This section instructs you how to upload files, use the Import History page to determine status of the upload, and how to view the log to take a deeper dive if there are data errors to resolve.
Upload a CSV File
After CSV templates are downloaded and populated with required data, the files can be uploaded into Tech Admin.
- Click the Export and Import button from the Tech Admin homepage. The Import Data area appears.
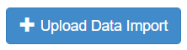
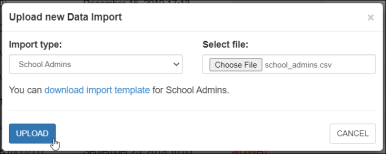
- At the bottom of the page click the Upload Data Import button. The ‘Upload New Data Import’ modal appears.
- Select a data entity from the Import Type dropdown list.

- Click the Choose File button. A window accessing your local machine’s files opens.
-
Find and select the populated file. The file name appears in the Select file box.
-
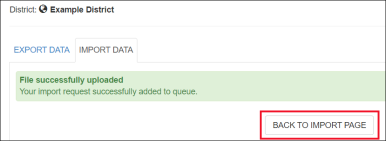
Click the Upload button. The 'File successfully uploaded' message appears.
- Click the Back to Import Page button to view the status and details of the import.

|
The same process is used to import the Teachers, Students and Classes templates. Select the entity from the drop-down menu to match the file ready for upload. |
Import History Details
The Import History table displays the results of each data upload. If every line of data on the CSV file was accepted into the system, the upload is marked as ‘Completed’. If data errors are found the upload is marked as ‘Incomplete’.
The number of data errors found is indicated by the red number next to the entity title. The green number indicates the number of line items on the data sheet that were accepted and processed.
Click the ‘view log’ link whenever an import is ‘Incomplete’ for more details about any errors found.

View Log Details
The View log page contains detailed information related to a specific import. The page allows administrators to see the status of each line of data that was imported from the CSV. Further, the data from each CSV template cell can be accessed to aid in troubleshooting potential data issues.
The Line number (row number) represents a specific row of data in the imported template. The line number specifies where in the template the data error, if any, occurred during the import. Use the line number to go back to the template, correct the issue, and import again.
|
|
As displayed on the image below, the line list starts at 2. This is because the first line of a CSV template is the column headers. |
Click the ‘view’ link to see the exact data that was included on the CSV template.

The following statuses by line (row) appear in the Status column.
- Created - Import data that creates new records, like new teachers or students.
- Updated - Import data that revises records already found in the system, such as password changes.
- No change - Import data that does not contain any new or revised data.
- Error - Import data that was not accepted into the system for the listed reason.
Using the ‘Sort By’ drop-down can re-arrange the data displayed by the following:
- Line Number (default view)
- Time Created
- Status